Part 1: When to Use iPhoto Plus 4
Part 2: A Sample Scan with iPhoto Plus 4
Part 3: Taking the Tours and Viewing the Screenbook
Part 4: After the Scan: Saving, Printing, Re-Sizing
Part 5: Using the iPhoto Plus 4 Explorer
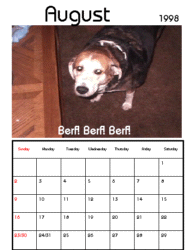
Part 6: Illustrated Examples of a Quick Card and Calendar Templates
Making A Calendar
Step One: First we open iPhoto Plus 4. To make a calendar, we need to start with an image. Scan or open an image so that it appears in the center of the iPhoto Plus 4 screen. For help scanning or using the iPhoto Plus 4 Explorer, see parts 2 and 5 of the tutorial.
Step Two: Once we have our image, click on the Calendar icon along the top row. If the Calendar icon is not present along the top row, click the Quick Task icon on the left-hand side.
Step Three: The Calendar window opens giving us the calendar options. The left side of the Calendar window shows us a preview of what our calendar will look like. It defaults to the "Classic" calendar with our image on the top and the month below it.
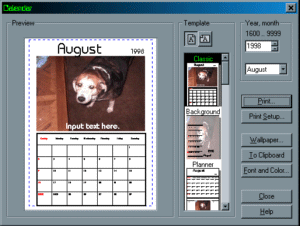
Step Four: To the right of the preview is the template menu. Here we can scroll through the various calendar designs to find the one we prefer. At the top of the template menu is a selection for either portrait or landscape calendar designs.

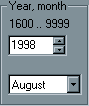
Step Five: After our design is chosen, we continue to the right on the Calendar window. The next menu on the right lets us choose the year and month our calendar will be for. Highlight and type in the year desired, such as 1998, and then use the pull-down menu to choose the month.
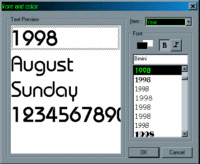
Step Six: Below the year and month menu are several buttons for when the calendar is complete as well as a Font and Color button. Clicking the Font and Color button brings up a second window where we can change the fonts of our calendar text. The Item pull-down menu lets us select the different text elements. Below the Item menu is the foreground and background colors that we can click to change, as well as the Bold or Italic text settings. The final selection window displays the selected text in the available fonts. Highlighting a new font changes the font on the calendar. Once the fonts and colors are chosen, click the OK button to return to the Calendar window.
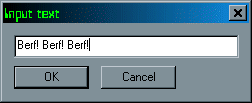
Step Seven: The parts of the Calendar window preview can also be changed, moved or re-sized. For example, clicking on our image will select it. We can click in the center and drag the image to a new spot on the page, or click on the edges and make the image larger or smaller. We can also move the location of the month, the year and the actual days themselves or change their size. Many of the calendar designs feature a line of text that we can customize, usually labeled as "Input text here." We can re-size or relocate this text, or we can double-click it to change it into a line of our choosing.
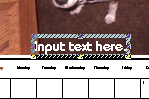
Double-click the "Input text here box." Type the new text and then click OK.
Step Eight: Once we have finalized all of our text, our calendar is ready. We can either print it by clicking on the Print button, make it into our Windows wallpaper by clicking on the To Wallpaper button, or send it to the Windows clipboard for to be pasted into another program by clicking the To Clipboard button.